> ## Documentation Index
> Fetch the complete documentation index at: https://help.comdesk.com/llms.txt
> Use this file to discover all available pages before exploring further.

# ワークグループ作成

各ワークグループ毎に表示させたいリスト項目や応対者、ステータスを変えることができます。

活用事例：以下のように、ワークグループを分けてお使いいただけます。\
・販売商材（例：toB、toC）ごと\
・部署ごと

## **「ワークグループ管理」からワークグループを作成する**

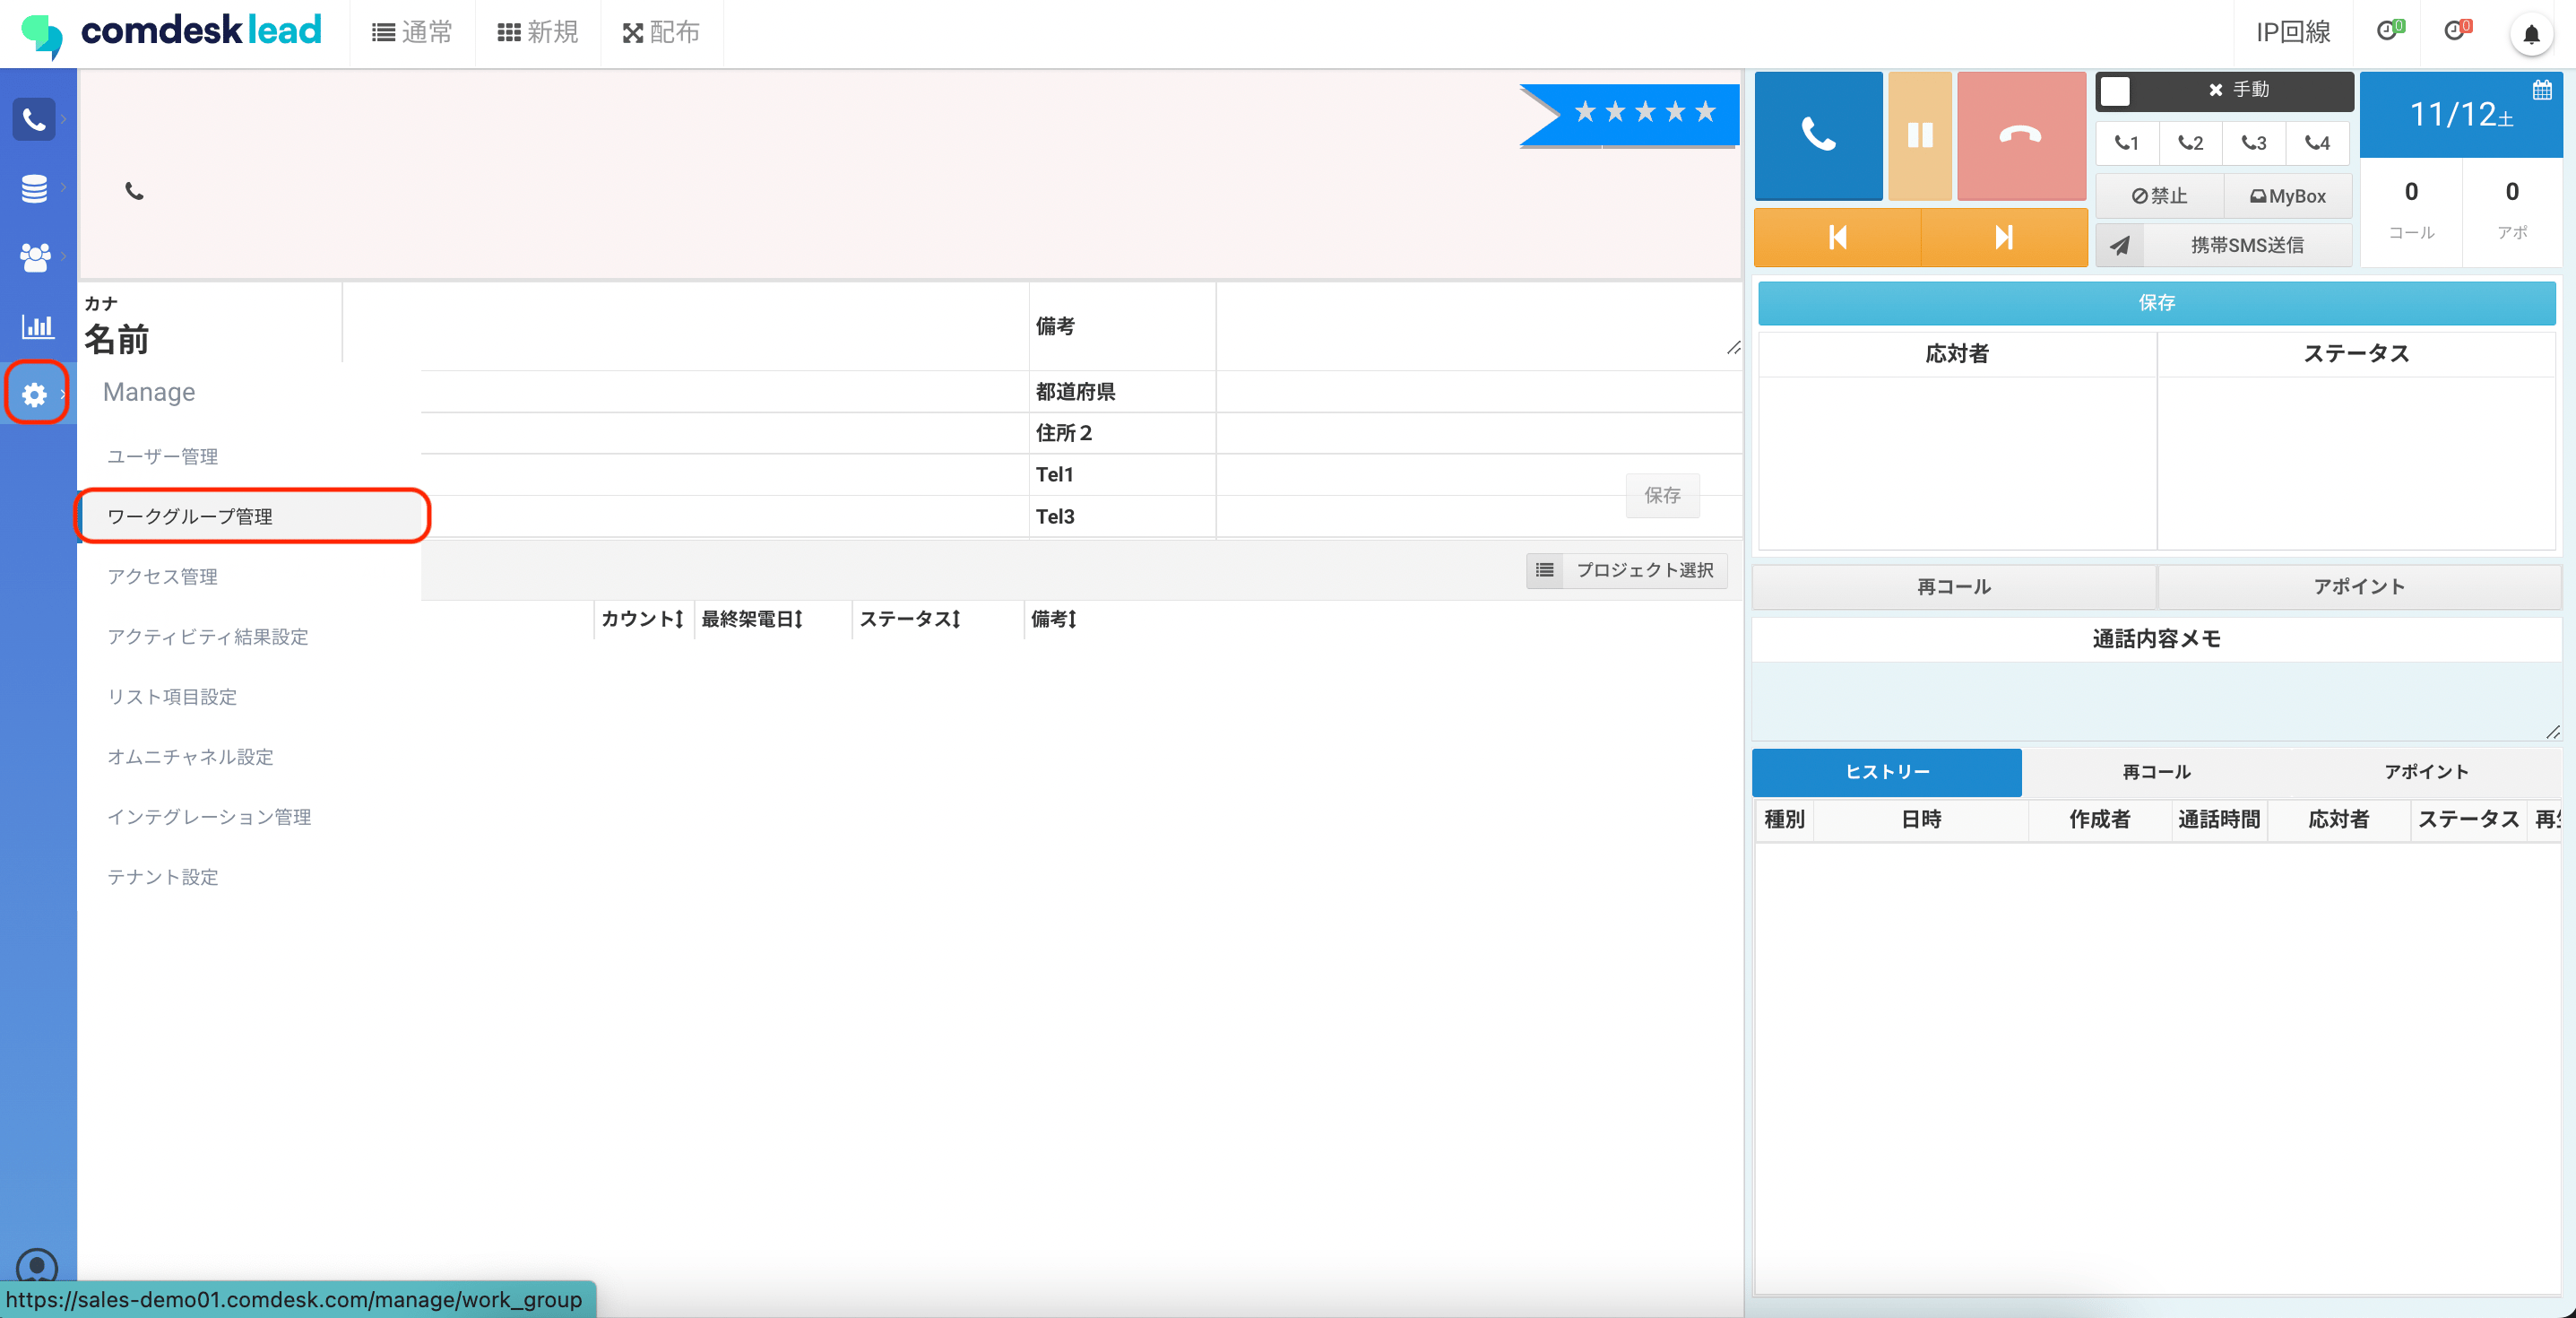
1. 画面左側の「Manage」アイコンを選択し、「ワークグループ管理」をクリックします。
   <img src="https://mintcdn.com/comdesk/bh7YpWZjOWK9T4Nq/.gitbook/assets/12736179273497_0.png?fit=max&auto=format&n=bh7YpWZjOWK9T4Nq&q=85&s=641bdc9a176e6a9183664bfc0ada9c1b" alt="CDL____________.png" width="2874" height="1470" data-path=".gitbook/assets/12736179273497_0.png" />
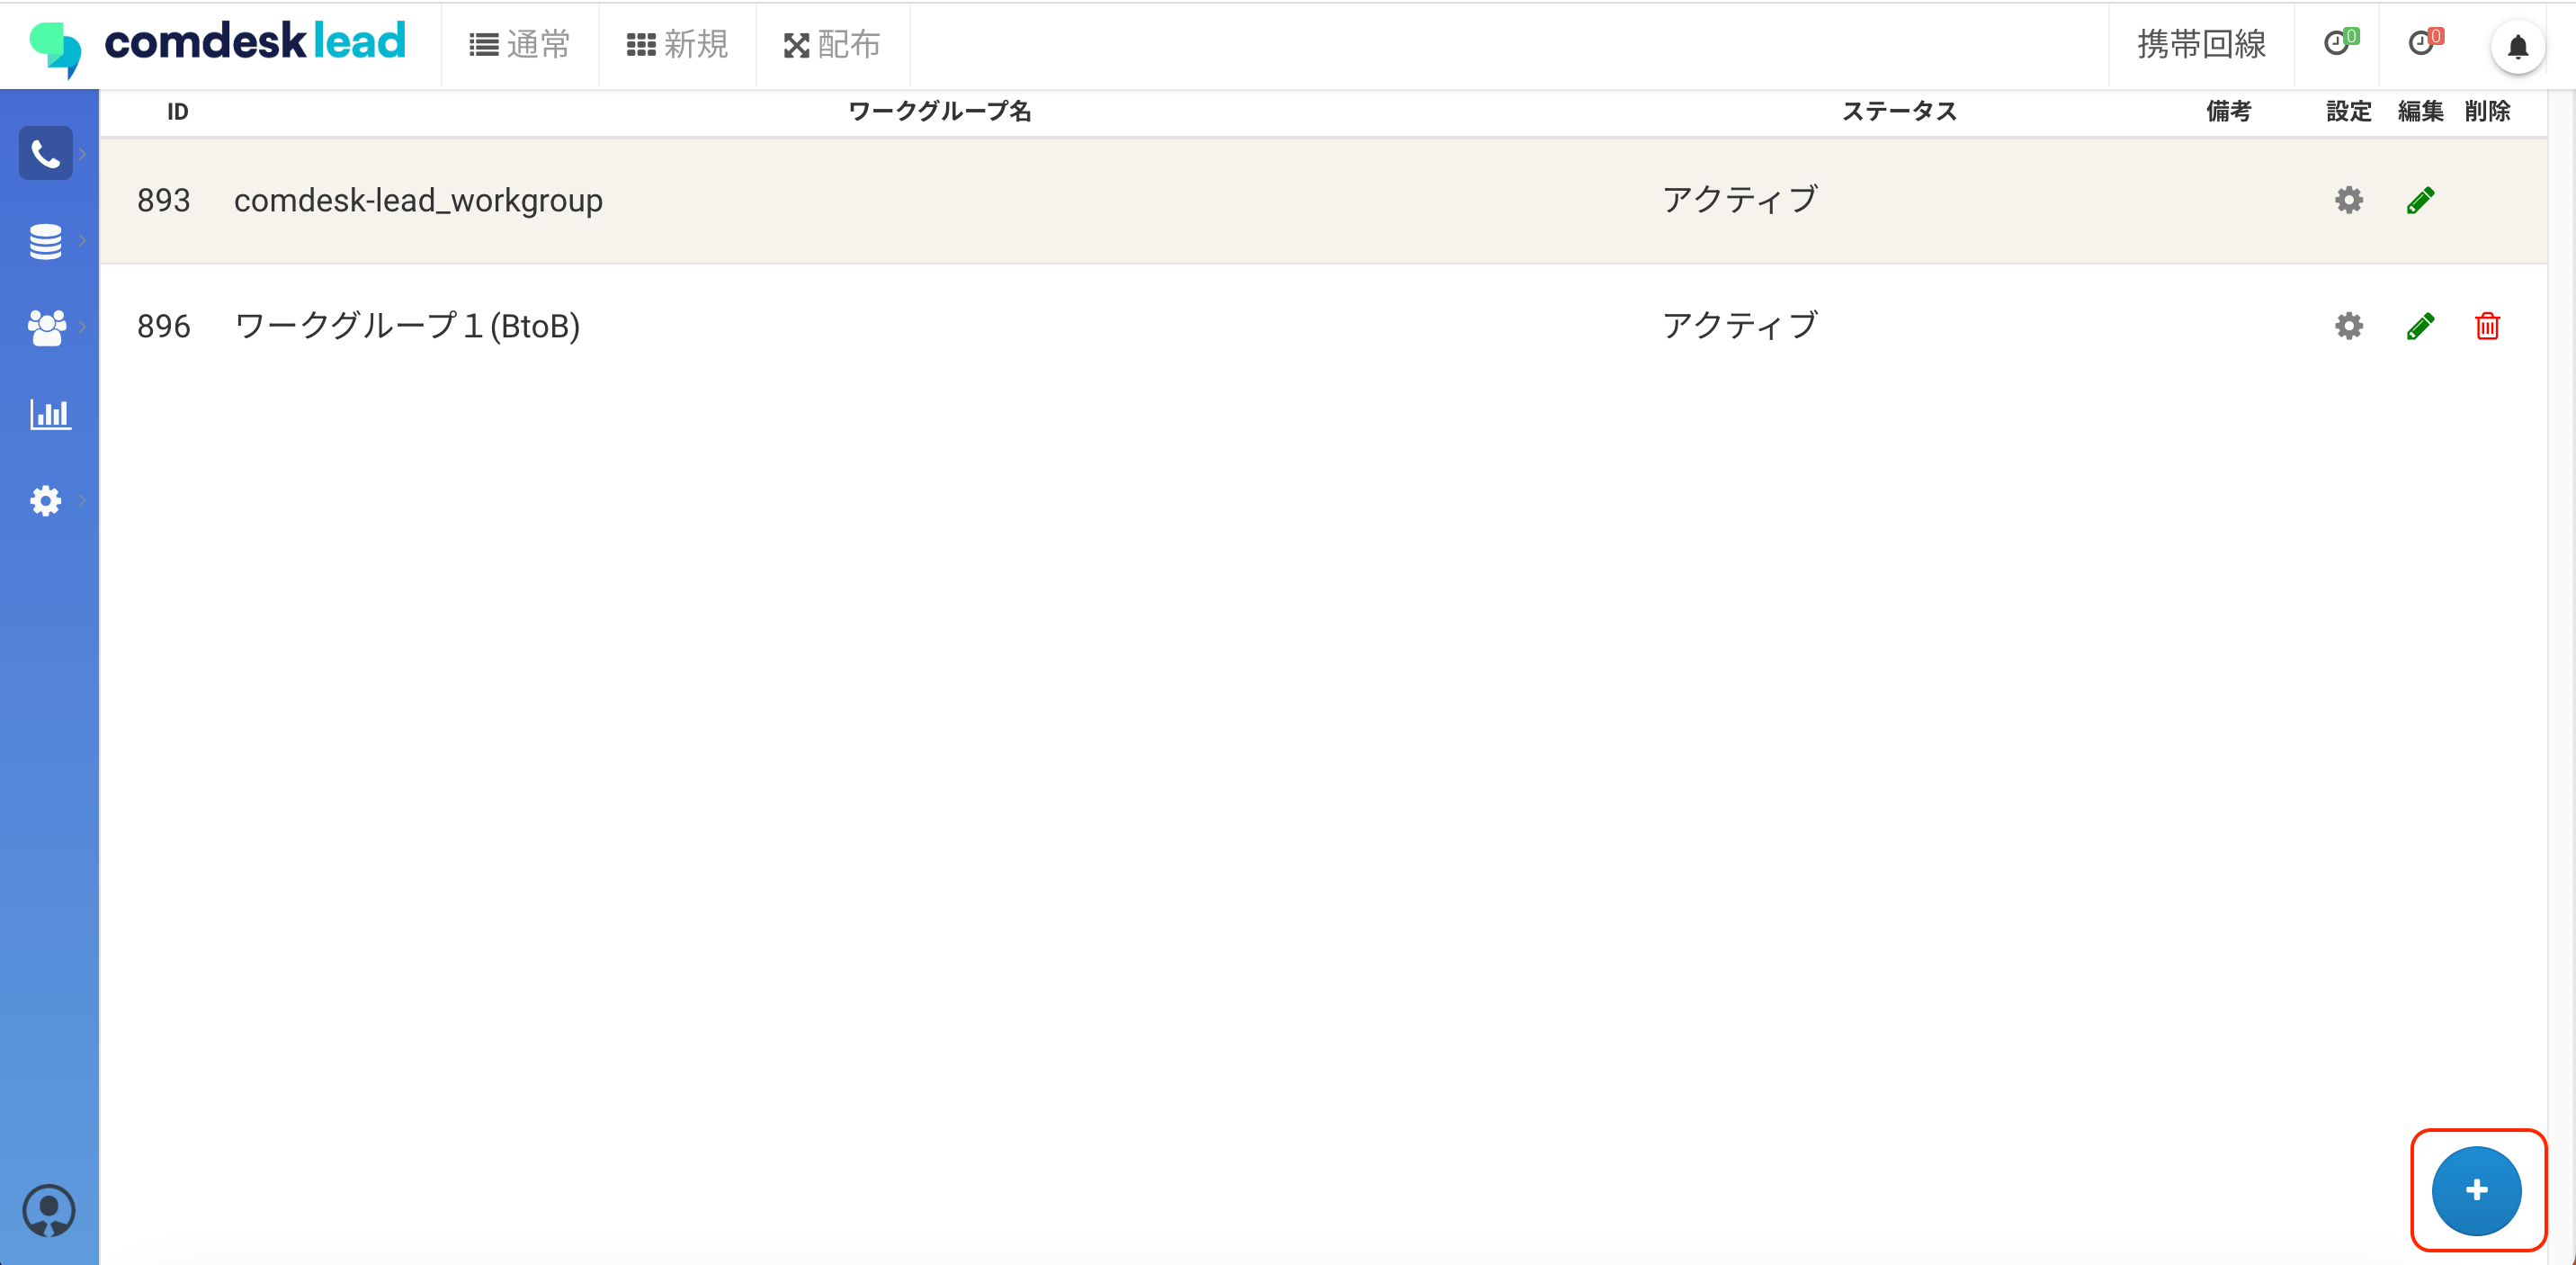
2. ワークグループ管理画面が表示されますので、画面右下の「＋」ボタンをクリックします。

   <img src="https://mintcdn.com/comdesk/bh7YpWZjOWK9T4Nq/.gitbook/assets/12736179273497_1.png?fit=max&auto=format&n=bh7YpWZjOWK9T4Nq&q=85&s=dcf777e22aa8d634a1ef33f9743b9087" alt="__________2022-11-24_14.40.35.png" width="2864" height="1406" data-path=".gitbook/assets/12736179273497_1.png" />
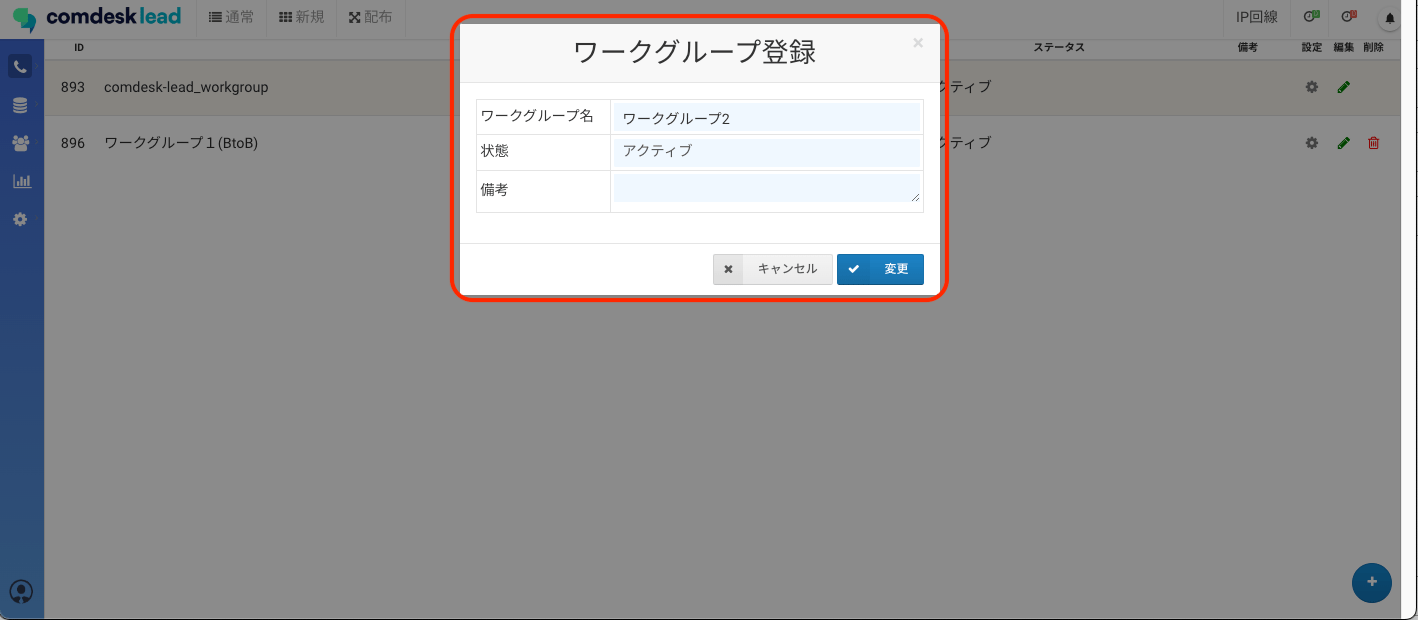
3. ワークグループ登録画面が表示されますので、ワークグループ名を入力し、「変更」ボタンをクリックします。
   <img src="https://mintcdn.com/comdesk/bh7YpWZjOWK9T4Nq/.gitbook/assets/12736179273497_2.png?fit=max&auto=format&n=bh7YpWZjOWK9T4Nq&q=85&s=79d27133ed8cd158c19458a0bcd3b778" alt="__________2022-11-25_10.19.57.png" width="1418" height="620" data-path=".gitbook/assets/12736179273497_2.png" />
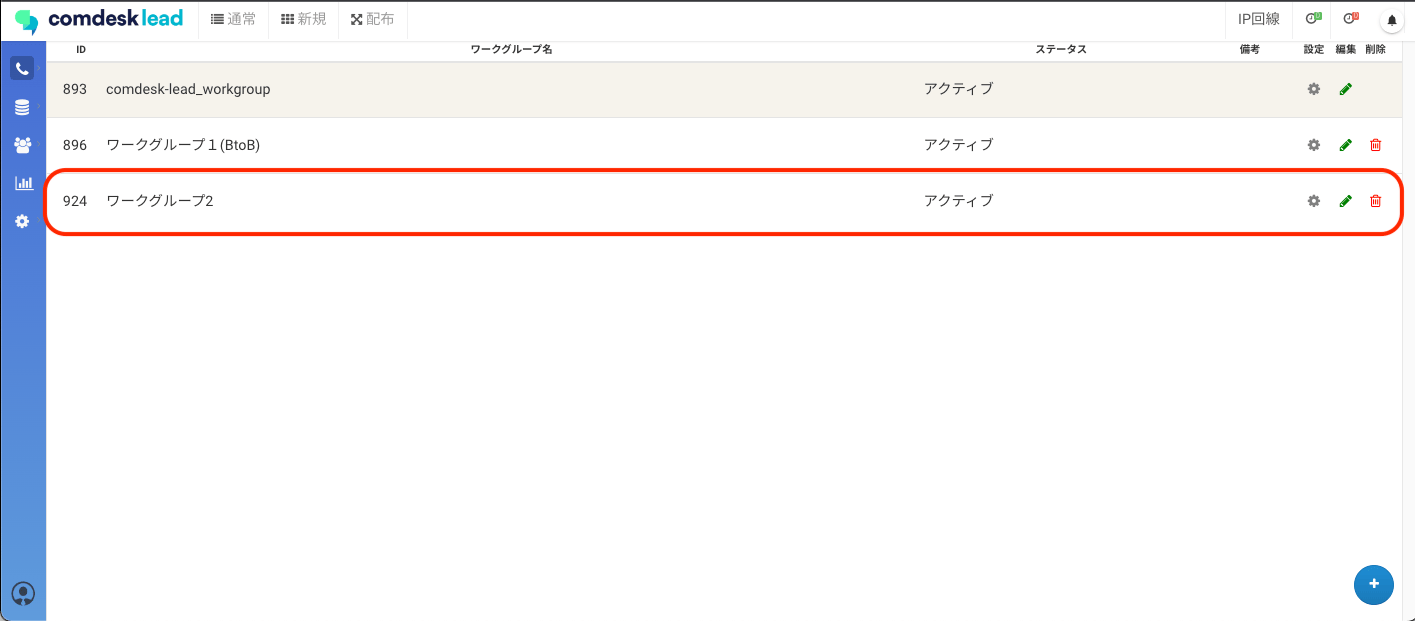
4. ワークグループの作成が完了しました。\\
   <img src="https://mintcdn.com/comdesk/bh7YpWZjOWK9T4Nq/.gitbook/assets/12736179273497_3.png?fit=max&auto=format&n=bh7YpWZjOWK9T4Nq&q=85&s=105d74e7637df0e580e3908a9dee8782" alt="__________2022-11-25_10.20.05.png" width="1415" height="621" data-path=".gitbook/assets/12736179273497_3.png" />

その他ご不明点などございましたら、[**サポートチームまでお問い合わせ**](#contact)をお願い致します。